 Breakfast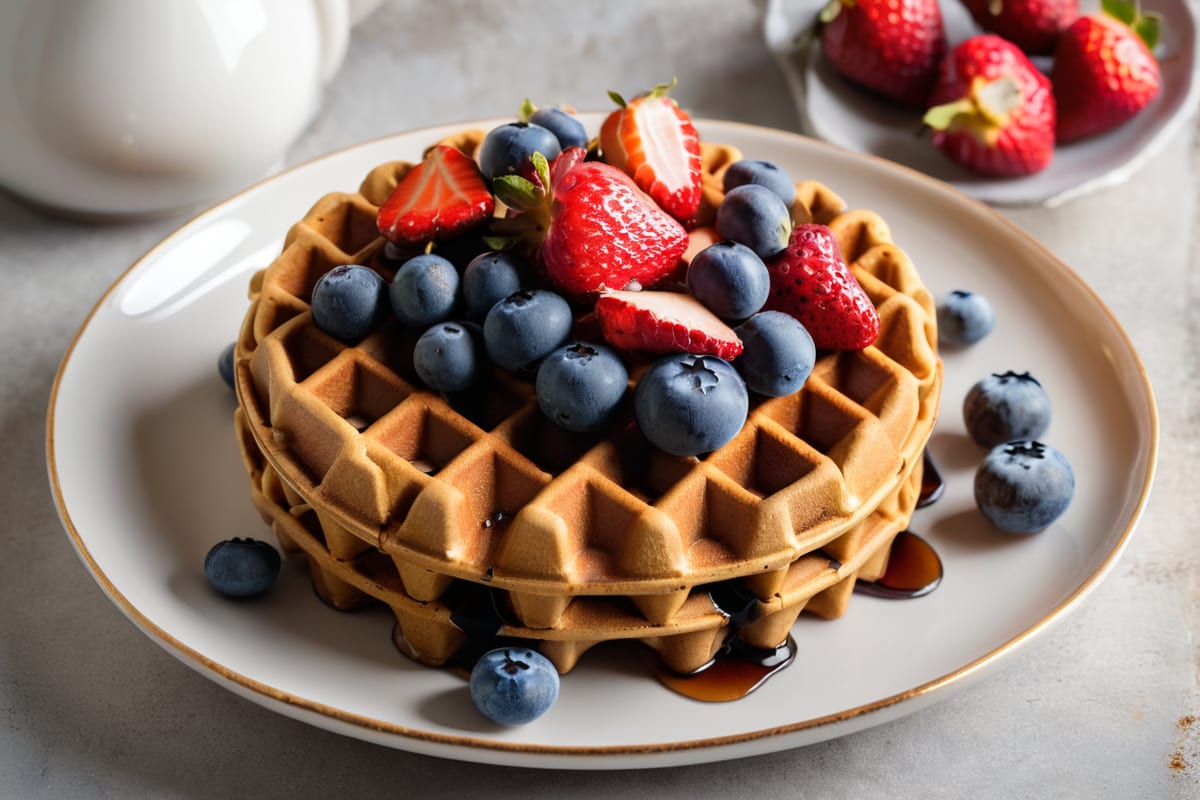
Gluten-Free · Dairy-Free · Breakfast  By SavoryFolks May 18, 2026
4.9
By SavoryFolks May 18, 2026
4.9
Gluten Free Waffles — Crispy Outside, Fluffy Inside Every Time
These gluten free waffles are crispy on the outside, fluffy inside, and ready in 30 minutes. The flour blend trick makes all the difference.
Hey folks,
If you’ve ever pulled a sad, limp, gummy waffle out of a gluten-free batter and just… stared at it in disappointment, this recipe is for you. That used to be me every Sunday morning — I tried recipe after recipe and kept getting this pale, soft thing that stuck to the iron and tasted like cardboard. The problem, I eventually figured out, wasn’t my technique. It was the flour. Or more accurately, using just one flour.
These gluten free waffles use a three-flour blend — almond flour for richness, oat flour for structure, and tapioca starch for that crispy snap on the outside. It sounds like a lot, but once you’ve mixed the dry ingredients together once, you’ll probably just batch them up and keep a jar on the counter. I do. The whole thing comes together in about 10 minutes of actual work, and the results are genuinely the best gluten free waffle recipe I’ve landed on after a lot of failed Sunday mornings.
Crispy edges, soft and airy middle, holds up under maple syrup without going soggy immediately. That’s the goal. And this one nails it.
Why It Works
The secret to a great gluten free waffle recipe easy enough to make on a weekday is understanding what each ingredient actually does — because without gluten, you don’t have that stretchy protein network holding everything together. You have to rebuild structure a different way.
Almond flour brings fat and moisture, which gives the waffles their tender crumb. But almond flour alone makes waffles that are dense and a little greasy. That’s where certified gluten free oat flour comes in. Oat flour has more starch than almond flour, and it acts more like a conventional flour base — it gives the batter something to lean on, structure-wise. Together, these two flours work really well. But the real move? Tapioca starch.
Tapioca starch is what makes the outside of the waffle actually crisp. According to Bob’s Red Mill’s guide to gluten-free baking, starches like tapioca are key to achieving the texture that traditional wheat flour provides naturally — they gelatinize during cooking and create that satisfying bite on the exterior. Without it, you get a waffle that’s soft all the way through. Fine, but not what we’re after here.
The eggs do double duty — they bind the batter (important without gluten) and also create lift when the steam hits the hot iron. Coconut oil keeps everything dairy-free and adds a very subtle sweetness that plays nicely with vanilla. And baking powder gives you that puff in the middle that makes a waffle feel light instead of dense.
One more thing: don’t skip resting the batter. Even five minutes makes a difference. The flours hydrate, the baking powder activates slightly, and the whole thing comes together. I skipped it once because I was impatient and the waffles were noticeably flatter. Lesson learned.
Ingredients
Here’s what you need, and why each thing matters:
Bob’s Red Mill almond flour — this is the base. Use blanched almond flour, not almond meal. Almond meal is coarser and will give you a grainier texture. The difference is real. For a crispy gluten free waffles almond flour recipe that actually works, blanched is the way to go.
Certified gluten free oat flour — if you have a sensitivity to oats, you can skip this and replace it with more almond flour and an extra tablespoon of tapioca starch. But if oats work for you, don’t skip this. It’s what gives the waffles a more “normal” waffle texture. I use Bob’s Red Mill certified GF oat flour — plain text mention here because we’ve already linked to the almond flour above.
Tapioca starch — non-negotiable for crispiness. Arrowroot works in a pinch, though I find the texture is slightly less snappy.
Baking powder — make sure yours is fresh. Old baking powder = flat waffles. If you can’t remember when you bought it, just buy a new one.
Coconut sugar — just a tablespoon, mostly to add a little depth of flavor. Regular granulated sugar works too.
Eggs — large, room temperature if you can manage it. Cold eggs can make the coconut oil seize up into little lumps.
Unsweetened almond milk — any non-dairy milk works here. Oat milk gives a slightly richer flavor. Coconut milk from a carton (not a can) also works great.
Melted coconut oil — let it cool slightly before adding it to the batter, especially if your eggs are cold. You don’t want scrambled eggs in your waffle batter. (I’ve done it. It’s not great.)
Vanilla extract — pure, not imitation. One teaspoon.
Instructions
-
Preheat your waffle iron and let it get fully hot before you start. This is the step people rush and then wonder why their waffles stick. A properly preheated iron — and a good brush of coconut oil on both plates — is what gives you that golden crust.
-
Whisk the dry ingredients together in a large bowl: almond flour, oat flour, tapioca starch, baking powder, coconut sugar, and salt. Break up any clumps in the almond flour with a fork before whisking.
-
Mix the wet ingredients separately in a medium bowl or large measuring cup: eggs, almond milk, melted coconut oil, and vanilla. Whisk until well combined.
-
Pour the wet ingredients into the dry and stir until just combined. The batter will be thicker than pancake batter — that’s normal. Don’t overmix. A few small lumps are fine. Overmixing makes the waffles tough.
-
Let the batter rest for 5 minutes. Set a timer. Walk away. This step matters (see Why It Works above).
-
Brush your waffle iron generously with coconut oil right before you pour the batter. Don’t be shy — gluten-free waffles stick more than regular ones because there’s no gluten to hold them together as they release.
-
Pour about ¾ cup of batter onto the iron (adjust for your specific iron size — mine takes about ¾ cup per waffle). Close the lid and don’t open it for at least 3 minutes. Opening early is how waffles tear.
-
Cook until the steam stops or slows significantly, then cook one more minute. That extra minute is what gives you the crispy exterior. If your iron has a light or beep, ignore it and wait for the steam to chill out first.
-
Remove carefully using a fork or tongs, not a spatula — you can work the fork gently around the edges to release before lifting. Place on a wire rack, not a plate, if you want to keep them crispy while you make the rest.
-
Repeat with remaining batter, brushing the iron with coconut oil between each waffle.
Tips & Substitutions
For the crispiest waffles: Put finished waffles directly on the rack of a 200°F oven while you finish the batch. Stacking them on a plate traps steam and makes them go soft fast. The wire rack method keeps them crispy for 20–30 minutes easily.
No eggs? This is actually doable. For gluten free waffles oat flour light fluffy without eggs, use 2 flax eggs (2 tablespoons ground flax + 6 tablespoons water, rested 5 minutes) in place of the regular eggs. The texture is slightly less airy but still genuinely good. The waffles will be a little more dense and less golden, but they hold together well and the flavor is great.
Make-ahead and freezing: These freeze beautifully. Let them cool completely on a wire rack, then freeze in a single layer on a baking sheet before stacking in a zip-lock bag. Reheat in the toaster on medium — they come out crispy, honestly almost as good as fresh. Way better than most gluten free frozen waffles from the store, and you control exactly what’s in them.
No oat flour? Use a second 1:1 swap of almond flour plus an extra tablespoon of tapioca starch. The waffles will be slightly richer and a touch less structured, but still work. Another option is certified GF sorghum flour, which gives a similar mild flavor to oat flour.
Savory waffles: Skip the vanilla and coconut sugar, add ½ teaspoon garlic powder and a handful of chopped fresh chives to the batter. Serve with a fried egg on top. It sounds weird. It’s incredible.
Your iron matters: I’ve made these on four different waffle irons and the cooking time varies. Belgian irons run hotter and cook faster. Thin-grid irons take longer but give more crispy surface area. Learn your iron. The steam test (wait for steam to slow) works universally better than timing.
Looking for more gluten-free breakfast ideas? Try our Gluten Free Banana Pancakes or our Gluten Free French Toast — both use the same “rest the batter” principle and come out just as good.
Frequently Asked Questions
Are frozen waffles gluten free? Most standard frozen waffles are not gluten free — they’re made with wheat flour. There are some certified GF frozen waffle brands available, like Van’s, but ingredient lists and manufacturing facilities vary. Always check the label carefully for a certified gluten-free seal. Honestly, making a batch at home and freezing them yourself gives you more control and, in my opinion, way better texture than anything you’ll find in the freezer aisle.
What flour is best for gluten free waffles? A blend works much better than a single flour. Almond flour brings richness and tenderness, oat flour adds structure and a mild flavor, and tapioca starch creates that crispy exterior. If you want a one-bag solution, a good gluten-free 1-to-1 all-purpose flour blend can work in a pinch, but the almond flour and oat flour combo genuinely gives better flavor and texture for waffles specifically.
Why are my gluten free waffles sticking to the iron? Two reasons, usually: the iron isn’t hot enough before you start, and/or you’re not using enough oil on the plates. Gluten-free batters stick more easily than wheat-based ones because there’s no gluten network to help the waffle release cleanly. Preheat fully, oil generously before every single waffle, and wait for the steam to slow before opening the iron.
Can I make gluten free waffles ahead of time? Yes, and they actually keep really well. Cool completely on a wire rack, freeze in a single layer, then bag them up. Reheat in the toaster — not the microwave, which makes them soft — and they come out crispy and delicious. They’ll keep in the freezer for up to 2 months.
Can I use this batter to make pancakes instead? Absolutely. Thin the batter slightly with an extra splash of almond milk (about 2–3 tablespoons) so it spreads on the griddle. Cook on medium heat, flip when bubbles form on the surface and the edges look set. The flavor is identical and they’re genuinely great pancakes. The tapioca starch gives the edges a slight chewiness that works really well in pancake form too.
The Bottom Line
These gluten free waffles are what Sunday mornings should look like. 🧇 Crispy outside, soft and fluffy inside, no weird aftertaste, and made with ingredients that actually make sense together. The three-flour blend is the key move — once you try it, you’ll get why using just almond flour or just oat flour alone never quite hits the mark.
Make a double batch, freeze half, and you’ve got weekday breakfast sorted for two weeks. Toast straight from frozen and you’ll honestly forget you’re eating something gluten-free.
If you try this almond flour waffles recipe, I’d love to hear how it goes in the comments. And if you swap anything out — especially on the egg-free version — let me know what worked. This recipe is still evolving and your notes genuinely help.
Per serving
Nutrition facts, the honest kind
Calculated from the exact ingredients we tested with. Estimates — your numbers will vary slightly based on brand and portion size.
- Calculated per serving (4 servings total)
- Includes all components as written
- No specialty-ingredient guesswork
Nutrition Facts
4 servings per recipe
Calories 310 kcal
% Daily Value*
Total Fat 14g
Total Carbohydrate 38g
Dietary Fiber 3g
Protein 9g
* Percent Daily Values are based on a 2,000 calorie diet. Estimated values; your numbers may vary.
More from the kitchen
All recipes