 Breakfast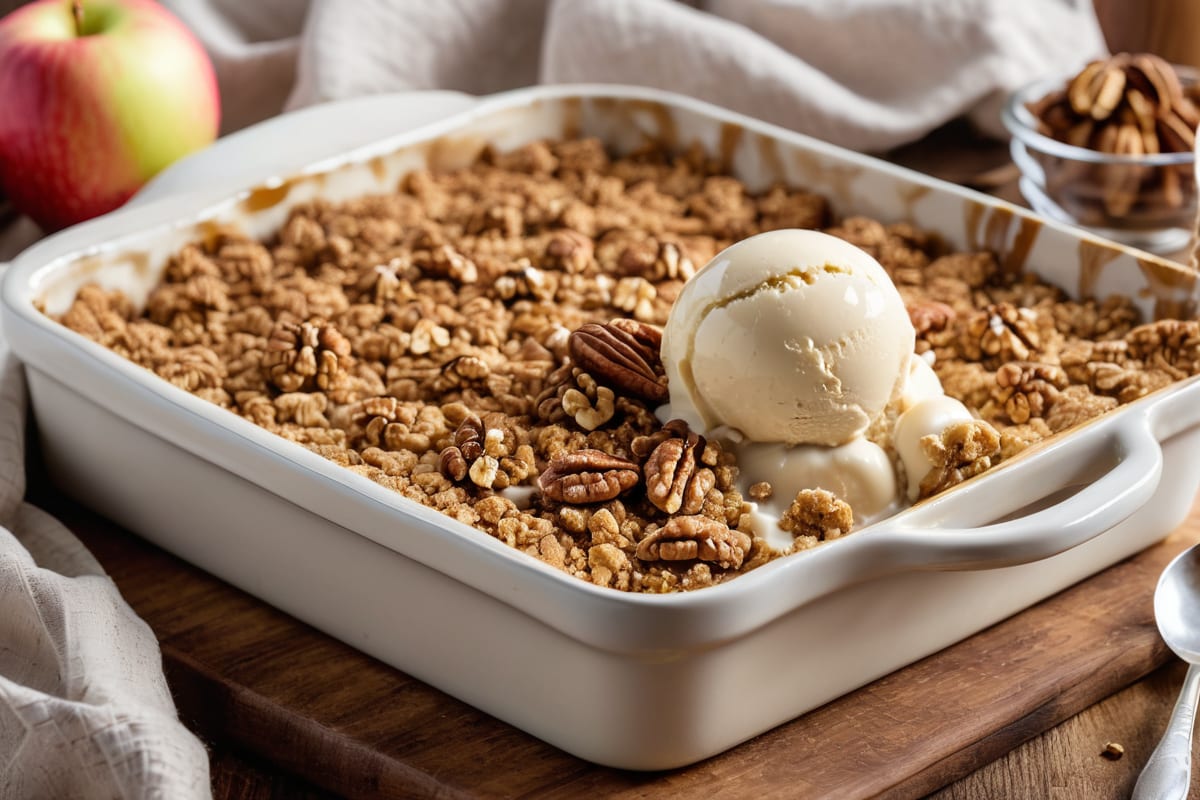
Gluten-Free · Dairy-Free · Dessert  By SavoryFolks May 18, 2026
4.9
By SavoryFolks May 18, 2026
4.9
Gluten Free Apple Crisp — Perfectly Crispy Oat Topping Every Time
This gluten free apple crisp has a buttery, golden oat topping and tender spiced apples underneath. Ready in 45 minutes, no fancy equipment needed.
Hey folks,
If you’ve ever pulled a “gluten free” apple crisp out of the oven and ended up with a soggy, pale, sad-looking topping instead of the golden crunchy situation you were promised — this recipe is for you. That’s exactly what happened to me the first two times I tried to adapt my grandma’s version. The topping kept going soft, the apples were swimming in juice, and the whole thing just sort of… collapsed into a mushy bowl of disappointment. Not great.
Here’s what was going wrong: the flour blend mattered way more than I thought, the butter needed to be genuinely cold, and the apples needed just a little starch to hold themselves together without getting gummy. Once I figured all three of those things out, this gluten free apple crisp recipe came together so fast I almost felt embarrassed it took me four tries to crack it. The topping is properly crunchy — like, crackle-when-you-tap-it crunchy — and the apples underneath are soft and jammy with just enough structure that you’re getting distinct slices, not applesauce. It’s the kind of dessert that makes people ask if you’re sure it’s gluten free. Yes. I’m sure. Let’s get into it.
Why It Works
The topping is really where a gluten free apple crumble lives or dies. Regular crisp toppings rely on wheat flour to bind the oats and butter together into those chunky, irregular clumps you want. Without gluten, a lot of recipes either go too sandy (way too much flour, not enough fat) or too wet (the butter melts before anything can set). The fix is a two-part thing.
First, you need a GF flour blend that actually behaves like flour. I use Bob’s Red Mill Gluten Free 1-to-1 Baking Flour here, and it’s genuinely the best swap I’ve found for crisp and crumble toppings. It has xanthan gum already built in, which helps the clumps hold their shape as they bake instead of spreading into a flat, greasy layer. As Bob’s Red Mill’s guide to gluten-free baking explains, getting the xanthan gum ratio right is often the difference between a topping that clumps and one that doesn’t — and using a pre-blended flour takes all that guesswork out of the equation.
Second, cold butter. Not room temperature. Not “I left it out for five minutes.” Actually cold, straight from the fridge, cut into cubes. You want to work it into the oat mixture with your fingers until it looks like rough, shaggy crumbles — some pea-sized pieces, some smaller. That’s exactly what you want. Those little pockets of butter are what create the crispy, almost caramelized spots in the topping. If the butter is too warm, it blends in smoothly and you lose all of that texture.
For the apples, the tapioca starch is doing a quiet but important job. It thickens the juice that the apples release during baking so it turns into a glossy, lightly syrupy situation instead of a watery puddle. Cornstarch works fine too if that’s what you have. And the lemon juice isn’t just there for flavor — it keeps the apple slices from browning while you prep everything, and it brightens the whole filling without making it taste lemony.
Ingredients
Most of this is pantry stuff, which is part of why I make this so often. A few notes before you shop:
The apples: I’ve tried basically every variety at this point. My personal ranking is Honeycrisp first (they hold their shape beautifully and have just the right sweet-tart balance), Granny Smith second (very tart, stays firm, great if you like a more assertive filling), and Braeburn or Pink Lady as solid alternatives. Don’t use Red Delicious — they get mushy and weirdly sweet. I tried it once. You’ll regret it.
The oats: This is non-negotiable if you’re cooking for someone with a real gluten intolerance — you need certified gluten-free rolled oats. Regular oats are processed on shared equipment with wheat and can contain significant cross-contamination. Specifically for a crunchy gluten free apple crisp oat topping using certified GF oats, look for the certified GF label on the bag. Bob’s Red Mill, Anthony’s, and GF Harvest are all good options I’ve used.
The flour: As mentioned above, the Bob’s Red Mill 1-to-1 is my go-to here. It measures cup-for-cup just like regular all-purpose flour, so there’s no weird math involved.
The nuts: Walnuts or pecans, roughly chopped. I know the recipe says optional but I’ve made it without them and it’s just… less interesting. The nuts add another layer of crunch and a slightly bitter, toasty note that keeps the whole thing from being one-note sweet. Pecans give you more richness; walnuts give you more bite. Either works.
Instructions
-
Preheat and prep your pan. Get your oven to 350°F. Lightly butter an 8x8 or 9x9 inch baking dish. Either size works — a 9x9 gives you a thinner filling and crispier topping, an 8x8 gives you deeper apple layers. I usually go 8x8 when I want it more dessert-y, 9x9 when I’m serving it for brunch alongside something else.
-
Make the apple filling. Peel, core, and slice your apples into pieces about ¼ inch thick — you want slices, not chunks. Throw them in a large bowl with the granulated sugar, brown sugar, cinnamon, nutmeg, lemon juice, and tapioca starch. Toss everything together until the apples are evenly coated. Pour the filling into your prepared baking dish and spread it out in an even layer.
-
Make the crisp topping. In a separate medium bowl, stir together the rolled oats, GF flour, brown sugar, cinnamon, and salt. Add the cold butter cubes and use your fingertips to work the butter into the oat mixture, pressing and squeezing until you get rough, irregular clumps. Some will be pea-sized, some smaller — that’s exactly right. Don’t overwork it. The whole thing should look kind of shaggy and uneven. Stir in the nuts if you’re using them.
-
Assemble. Scatter the topping over the apples in an even-ish layer. Don’t pack it down — you want it loose so air can circulate and everything can crisp up properly.
-
Bake. Bake uncovered for 35–42 minutes, until the topping is deep golden brown and the apple filling is bubbling up around the edges. My oven runs a little hot so I usually check at 35 minutes, but most ovens need the full 40–42. If the topping is browning too fast, tent it loosely with foil for the last 10 minutes.
-
Rest before serving. Let it sit for at least 10 minutes before you dig in. I know that’s annoying when it smells this good, but the filling needs that time to set up a little. Straight out of the oven it’ll be quite liquid — ten minutes later it’s perfect. Serve with vanilla ice cream or a big spoonful of whipped cream.
Tips & Substitutions
Make it ahead: You can assemble the whole thing, topping and all, cover it with plastic wrap, and refrigerate it for up to 24 hours before baking. Just add about 5 minutes to the bake time since it’s starting cold.
No oats version: If you or someone you’re cooking for can’t do oats at all, even certified GF ones, you can absolutely make an easy gluten free apple crisp without oats. Replace the cup of oats with ½ cup more GF flour and ½ cup chopped nuts (almonds, pecans, or walnuts all work). The topping will be more sandy and crumble-like — less chunky crisp, more fine streusel — but it’s genuinely delicious. I’ve made this version for a few friends who avoid oats entirely and they’ve had zero complaints.
Brown butter topping: For a nuttier, richer topping, you can brown the butter before chilling it again. Melt it in a small saucepan over medium heat, swirling until it smells nutty and turns golden brown, then pour it into a bowl and refrigerate until it’s solid again (about 30–40 minutes). Use it exactly as you would cold butter. The difference is subtle but real.
Sweetness adjustment: If your apples are very sweet (like Fuji or Gala), cut the filling sugar down to 1 tablespoon total and lean on the lemon juice a little more. If you’re using tart Granny Smiths, you might want to bump it up to 3 tablespoons of granulated sugar.
Spice it up: This is a very reliable gluten free apple crumble recipe base — but feel free to play with the spices. A pinch of cardamom in the filling is really nice. Some people swear by a tiny bit of ground ginger. I’ve done both and liked them. Just don’t go overboard — the apple should still be the star.
Storage: Covered at room temperature for 2 days, or refrigerated for up to 5 days. Reheat individual portions in the microwave for about 45 seconds, or pop the whole dish back in a 325°F oven for 15 minutes to re-crisp the topping.
Frequently Asked Questions
How to make gluten free apple crisp topping that actually gets crunchy? The two things that matter most are cold butter and certified gluten-free rolled oats. Work the butter in with your fingers until you have rough, shaggy clumps — don’t melt it and don’t let it get warm. The oats provide texture, and the cold butter creates those crispy, caramelized pockets as it bakes. A GF flour blend with xanthan gum (like a 1-to-1 style flour) helps hold the clumps together so they don’t just spread flat.
Can apple crisp topping be gluten free? Absolutely, and it’s one of the easier desserts to adapt. The classic topping is just oats, flour, butter, sugar, and spices — swapping regular flour for a cup-for-cup GF flour blend and using certified gluten-free oats gets you all the way there. The texture is genuinely indistinguishable from the original when done right.
Is oatmeal safe to use in gluten free recipes? Regular oats are often contaminated with gluten from shared processing equipment, so they’re not considered safe for people avoiding gluten. For recipes for apple crisp with oatmeal that are truly gluten free, you need to specifically buy oats labeled “certified gluten-free.” These are grown and processed separately to avoid cross-contact.
What’s the best apple for apple crisp? Honeycrisp and Granny Smith are my top picks. They hold their shape during baking instead of turning to mush, and they both have enough flavor to stand up to the spices and sweet topping. Avoid Red Delicious and McIntosh — they break down too much and the filling ends up more like a thick applesauce.
Can I make gluten free apple crisp ahead of time? Yes — it’s actually one of the better make-ahead desserts. Assemble the whole dish (filling + topping), cover it tightly, and refrigerate for up to 24 hours before baking. Add about 5 extra minutes to the bake time. You can also bake it fully and reheat it in a 325°F oven for 15 minutes to revive the topping’s crunch before serving.
The Bottom Line
Honestly? This is one of those recipes that earns a permanent spot in your rotation. 🍎 It’s not fussy, it uses stuff you probably already have, and it tastes like the kind of dessert that takes way more effort than it actually does. The topping is genuinely crunchy — not pretend-crunchy, not crunchy-for-five-minutes-and-then-soft — and the apple filling is cozy and perfectly spiced.
The cold butter trick and the certified GF oats are the two things I’d really push you not to skip. Everything else has wiggle room. Use whatever apples you have. Skip the nuts if you need to. Swap the spices around. But get those two things right and this gluten free apple crumble recipe will come out beautifully every single time.
If you love cozy baked desserts, check out our Gluten Free Pumpkin Muffins for another easy fall bake, or our Gluten Free Blueberry Cobbler for when you want something a little lighter. Both are just as easy as this one and both pass the “actually tastes like the real thing” test. Which, honestly, is the only test that matters.
Per serving
Nutrition facts, the honest kind
Calculated from the exact ingredients we tested with. Estimates — your numbers will vary slightly based on brand and portion size.
- Calculated per serving (6 servings total)
- Includes all components as written
- No specialty-ingredient guesswork
Nutrition Facts
6 servings per recipe
Calories 320 kcal
% Daily Value*
Total Fat 12g
Total Carbohydrate 52g
Dietary Fiber 5g
Protein 4g
* Percent Daily Values are based on a 2,000 calorie diet. Estimated values; your numbers may vary.
More from the kitchen
All recipes