 Breakfast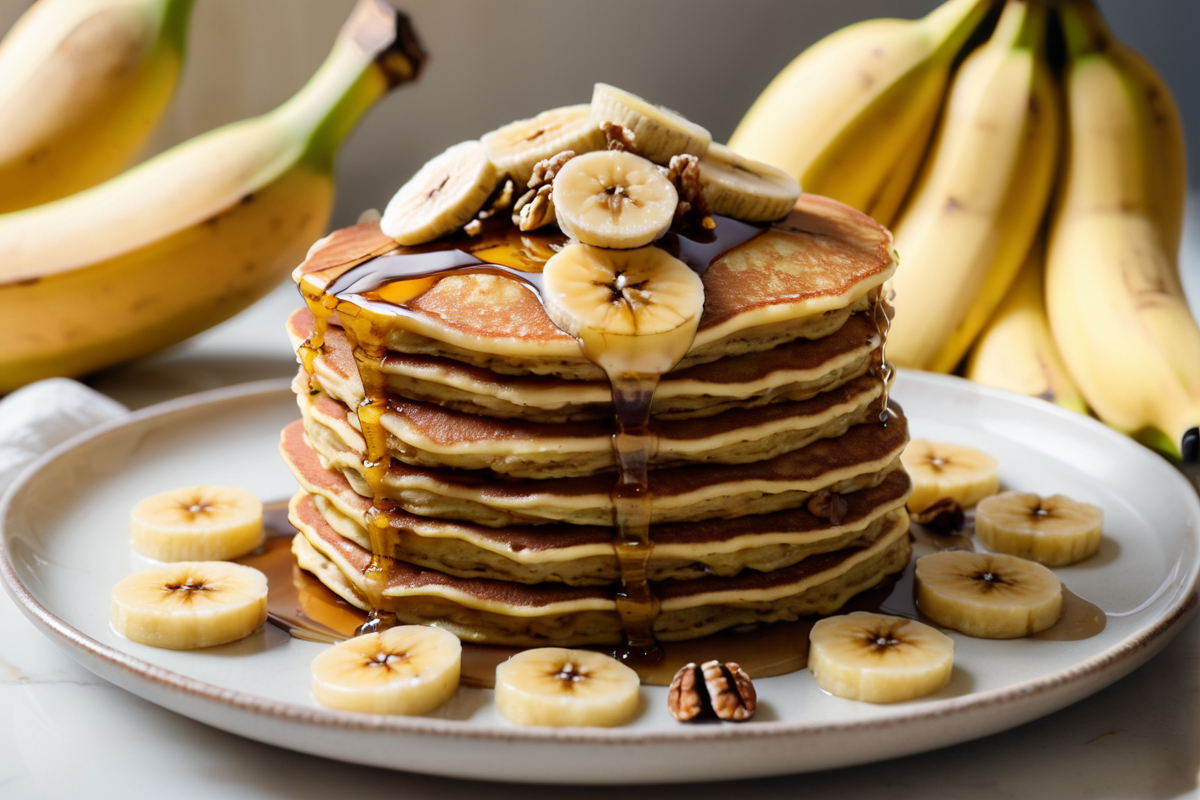
Gluten-Free · Dairy-Free · Breakfast  By SavoryFolks May 17, 2026
4.9
By SavoryFolks May 17, 2026
4.9
Gluten Free Banana Pancakes — Fluffy, One-Bowl Breakfast
Light, fluffy gluten free banana pancakes ready in 20 minutes. One bowl, simple ingredients, naturally sweet.
Hey folks, if you’ve been chasing a stack of truly fluffy gluten free banana pancakes that don’t taste like cardboard or fall apart the second they hit the spatula — this is the one. I’ve made this recipe more times than I can count, and I’ve watched it rescue sleepy weekend mornings for a lot of people who thought they’d never get a great pancake again after going gluten free. The bananas do two important jobs here: they sweeten the batter naturally so you don’t need much added sugar, and they bind everything together so the finished pancakes hold their shape beautifully. We’re using a trustworthy gluten free flour blend, almond milk to keep things dairy free, and a handful of pantry staples. One bowl, minimal cleanup, and you’re eating in under 30 minutes. That’s the whole pitch.
Why It Works
Gluten free pancakes fail for one main reason: without gluten, the batter has no elasticity to trap the bubbles that form when baking powder activates. Most people end up with flat, dense rounds. The fix in this recipe is twofold.
First, ripe bananas. The riper the banana — think deep yellow with plenty of brown spots — the more natural pectin it contains. Pectin acts as a mild binder, giving the batter a bit of structure in the absence of gluten. According to USDA FoodData, ripe bananas also carry more available simple sugars than green ones, which means better browning on the griddle and a more developed, caramelized flavor without loading up on added sweetener.
Second, the right flour blend matters enormously. A good gluten free 1-to-1 baking flour already contains xanthan gum or psyllium husk, which mimics the binding role gluten would normally play. Bob’s Red Mill Gluten Free 1-to-1 Baking Flour is my go-to because it’s widely available, certified gluten free, and it behaves predictably — no gummy texture, no graininess. The ratio of baking powder to baking soda in this batter creates a strong initial rise as well as sustained lift so your pancakes stay tall even after you flip them. Medium-low heat is the other non-negotiable. Rushing the cook on gluten free pancakes leads to a raw, gluey center even when the outside looks done. Slow and steady wins this one.
Ingredients
Here’s everything you need for a batch of gluten free banana pancakes serving four people (about 3 pancakes each):
Wet ingredients:
- 2 large ripe bananas, mashed well (about ¾ cup mashed)
- 2 large eggs
- ¾ cup unsweetened almond milk (or any dairy-free milk you have on hand)
- 1 tsp vanilla extract
- 1 tbsp maple syrup
Dry ingredients:
- 1¼ cups gluten free 1-to-1 baking flour
- 1½ tsp baking powder
- ½ tsp baking soda
- ¼ tsp ground cinnamon
- Pinch of fine sea salt
For the pan:
- 1 tbsp coconut oil or avocado oil
A note on bananas: this is genuinely the one time in cooking where you want the bananas your kids refuse to eat because they’ve gone too spotty. The more ripe, the better the flavor and the better the bind. If your bananas are still mostly yellow with no spots, the pancakes will be noticeably less sweet and slightly less fluffy.
Instructions
-
Mash the bananas — In a large mixing bowl, mash both bananas with a fork until almost completely smooth. A few small lumps are fine and will give a nice texture to the finished pancakes.
-
Add the wet ingredients — Crack the eggs into the bowl with the mashed banana. Add the almond milk, vanilla extract, and maple syrup. Whisk everything together until combined and mostly uniform.
-
Combine the dry ingredients — In a small separate bowl or directly into the wet bowl using a fine mesh sieve, add the gluten free flour, baking powder, baking soda, cinnamon, and salt.
-
Mix the batter — Stir the dry ingredients into the wet ingredients using a spatula or wooden spoon. Mix until just combined — stop as soon as you no longer see dry streaks of flour. Overmixing gluten free batter can make pancakes dense and gummy. The batter will be slightly thicker than conventional pancake batter. That is correct.
-
Rest the batter — Let the batter sit for 3 to 5 minutes while you heat the pan. This short rest lets the gluten free flour fully hydrate and gives the leaveners time to start activating.
-
Heat the pan — Place a large non-stick skillet or griddle over medium-low heat. Add the coconut oil and let it melt, swirling to coat the surface evenly. The pan is ready when a small drop of water flicked onto it sizzles immediately. If it smokes, lower the heat.
-
Cook the first side — Use a ¼ cup measure to scoop batter onto the pan, leaving at least 2 inches between pancakes. Cook undisturbed for 3 to 4 minutes. You’re looking for bubbles forming across the surface of the pancake and the edges beginning to look set and matte rather than wet and shiny. Do not press down on the pancakes.
-
Flip and finish — Flip each pancake in one confident motion and cook the second side for 2 to 3 minutes, until golden brown. Resist the urge to press them flat. Transfer to a plate and keep warm in a 200°F oven while you cook the remaining batches.
-
Serve immediately — Stack them up, hit them with maple syrup, and add toppings as you like. These gluten free banana pancakes are absolutely best right off the griddle.
Tips & Substitutions
On the flour: The 1-to-1 flour is genuinely important here. If you use a single-ingredient GF flour like almond flour or oat flour on its own, the structure and hydration ratios in this recipe won’t hold up the same way. If you want to experiment with oat flour, use certified gluten free oat flour and expect a denser, slightly chewier pancake — reduce the milk to ½ cup to compensate for the extra absorbency.
On the milk: Any unsweetened dairy-free milk works. Oat milk gives a slightly creamier result. Full-fat coconut milk from a can will make richly flavored pancakes but they’ll be heavier. Soy milk works perfectly. Regular dairy milk is fine if you’re not avoiding dairy.
Make it egg-free: Replace each egg with a flax egg (1 tbsp ground flaxseed + 3 tbsp water, rested 5 minutes). The pancakes will be a little more fragile to flip, so make them smaller — about 3 tablespoons of batter each instead of ¼ cup.
Flavor additions: Fold in ¼ cup of blueberries, mini chocolate chips, or chopped walnuts right before cooking. All three work great. A pinch of cardamom alongside the cinnamon is underrated and worth trying.
Keeping them warm: The 200°F oven trick is your friend for batch cooking. Lay the cooked pancakes flat on a baking sheet — don’t stack them until you’re ready to serve, or they’ll steam each other and lose their edges.
Storage and reheating: Leftover gluten free banana pancakes reheat remarkably well. Store in an airtight container in the fridge for up to 3 days. Reheat in a toaster on a low setting for the best texture — the outside crisps up just slightly while the interior stays soft. A microwave works but makes them soft all the way through, which some people prefer.
If you enjoy easy gluten free breakfasts, you might also love our Gluten Free Blueberry Muffins and our Dairy Free French Toast — both follow the same one-bowl, no-fuss approach.
Frequently Asked Questions
Can I make the batter the night before? You can mix the wet and dry components separately and store them covered in the fridge overnight, then combine them right before cooking. I don’t recommend mixing the full batter ahead of time because the leaveners will activate and exhaust themselves overnight, leaving you with flat pancakes in the morning. Thirty seconds of stirring right before you cook is a small ask for noticeably fluffier results.
Why are my gluten free banana pancakes falling apart when I flip them? Almost always this is a timing issue. Gluten free batters need a full 3 to 4 minutes on the first side — longer than regular pancake batter. If you’re flipping before the surface bubbles form and the edges look set, the pancake isn’t structurally ready. Let them go longer than you think you need to. Also check that your bananas were ripe, since underripe bananas don’t provide enough binding.
Can I freeze these pancakes? Absolutely, and they freeze beautifully. Let them cool completely, then lay them in a single layer on a parchment-lined baking sheet and freeze for about an hour until solid. Transfer to a zip-top freezer bag with a small square of parchment between each pancake. They’ll keep for up to 2 months. Reheat directly from frozen in the toaster.
My batter seems really thick — did I do something wrong? Nope, that’s right. Gluten free flour absorbs liquid differently than wheat flour, and the mashed banana adds body too. The batter should be scoopable but not pourable, almost like a thick muffin batter. If it seems unworkably stiff, add almond milk one tablespoon at a time until it loosens up slightly, but resist the urge to thin it all the way down to a regular pancake batter consistency.
Can I use frozen bananas? Yes — thaw them completely and drain any excess liquid before mashing. Frozen and thawed bananas release a lot of water, and if that water goes into the batter, your pancakes will be wetter and harder to cook through. Pat the mashed banana with a paper towel or drain it in a fine mesh sieve for a minute before adding it to the bowl.
The Bottom Line
These gluten free banana pancakes are genuinely the recipe I reach for every single weekend. 🍌 They’re everything a great breakfast should be: naturally sweet, fluffy in the middle, golden on the outside, and on the table in under 30 minutes without any complicated steps or hard-to-find ingredients. The one-bowl approach means you’re not standing at the sink for 20 minutes afterward either. Ripe bananas, a reliable GF flour blend, and a patient hand on the stovetop — that’s really all it takes. Make them once and I promise they’re going into your regular rotation. Tag us at SavoryFolks when you do, because a good stack of pancakes deserves to be seen. ✨
Per serving
Nutrition facts, the honest kind
Calculated from the exact ingredients we tested with. Estimates — your numbers will vary slightly based on brand and portion size.
- Calculated per serving (4 servings total)
- Includes all components as written
- No specialty-ingredient guesswork
Nutrition Facts
4 servings per recipe
Calories 290 kcal
% Daily Value*
Total Fat 8g
Total Carbohydrate 52g
Dietary Fiber 3g
Protein 6g
* Percent Daily Values are based on a 2,000 calorie diet. Estimated values; your numbers may vary.
More from the kitchen
All recipes