 Dinner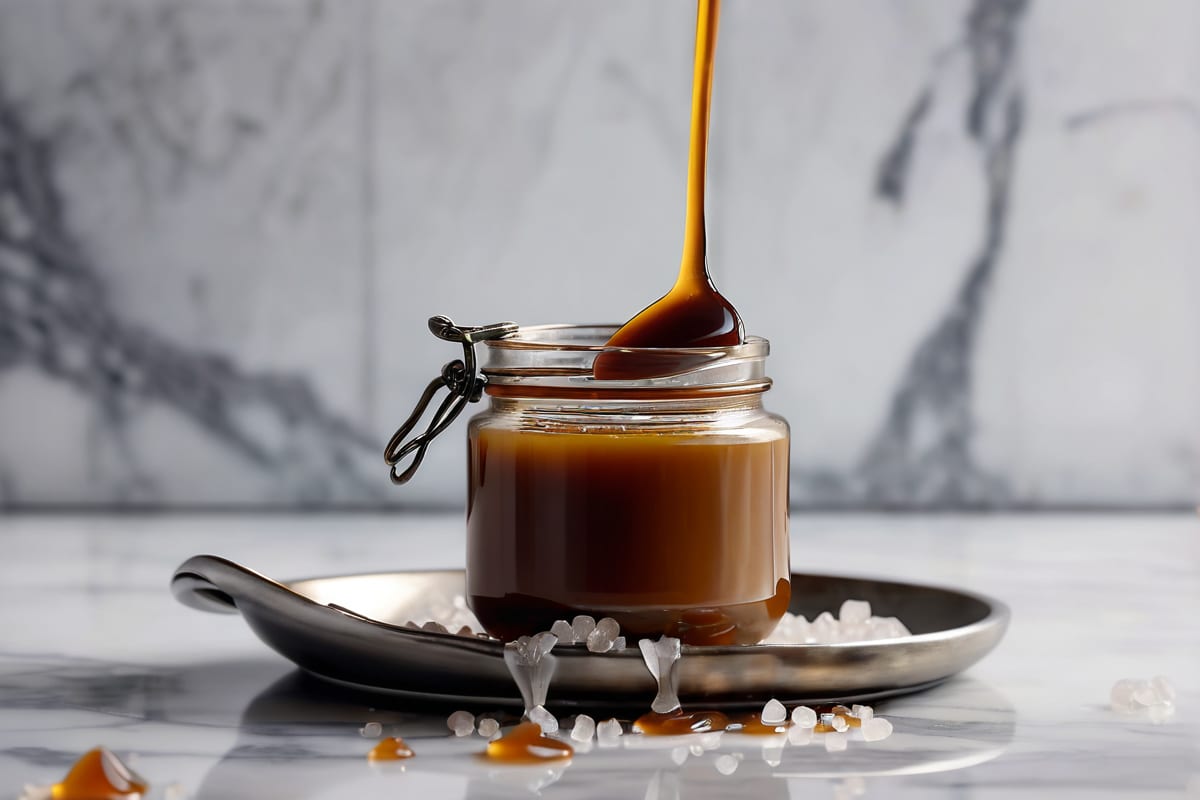
Gluten-Free · Dairy-Free · Side  By SavoryFolks May 18, 2026
4.9
By SavoryFolks May 18, 2026
4.9
Dairy Free Caramel Sauce — Rich, Gooey, No Butter Needed
This dairy free caramel sauce is deeply golden, thick, and ready in 20 minutes. Made with coconut milk — no butter, no cream, all the richness.
Hey folks,
If you’ve been burned by dairy free caramel sauce before — watery, grainy, weirdly pale — I totally get it. I made bad batches for months before I figured out the thing everyone skips over: you have to let the sugar go dark. Like, actually dark. Most people panic at the color and pull it off heat too early, and then they end up with something that tastes like sweet coconut soup. Not what we’re going for.
This dairy free caramel sauce uses full-fat canned coconut milk instead of heavy cream, and vegan butter instead of regular butter. And honestly? The result is so rich and gooey that I’ve served it to people who had no idea it wasn’t the real thing. My sister — who is very particular about dessert — asked me for the recipe before she’d even finished pouring it on her ice cream.
The whole thing comes together in about 20 minutes, one saucepan, and zero dairy ingredients. Whether you’re drizzling it on brownies, swirling it into coffee, or eating it directly off a spoon (no judgment), this is the recipe you’ll come back to every single time.
Why It Works
The magic here is the wet caramel method — you start by dissolving the sugar in water before the heat does anything. This gives the sugar time to melt evenly and dramatically reduces your chances of crystallization, which is that thing where your caramel suddenly turns into a grainy clumped mess. It happens, and it’s heartbreaking. The wet method just makes the process more forgiving, especially if you’re newer to candy-making.
Then comes the coconut milk. Full-fat, canned, shaken — not the stuff in a carton. The fat content in canned coconut milk is close enough to heavy cream that it behaves almost the same way when it hits the hot sugar. It bubbles up dramatically (that’s normal, don’t freak out), and then settles into this glossy, pourable sauce. According to USDA FoodData Central, full-fat coconut milk contains around 24g of fat per 100g, which is what gives this sauce its body and richness — it’s genuinely comparable to heavy cream in fat content.
The vegan butter goes in at the end, off heat. This is important. If you add it while the pan is still scorching hot and sitting on the burner, it can break the emulsion and you’ll end up with an oily top layer. I learned that the hard way. Pull the pan off the heat, then add the butter and stir until it melts in smoothly.
And if you’re going for a dairy free salted caramel sauce, the flaky sea salt goes in last — after the butter, after the vanilla. Taste as you go. Some people want a whisper of salt, some people want it front and center. You do you.
Ingredients
Here’s what you need, and a few notes on each:
Sugar — Plain granulated white sugar. Don’t use coconut sugar or brown sugar here; they burn faster and behave differently. This is one recipe where white sugar is the right call.
Water — Just enough to dissolve the sugar and give you control over the cooking speed. It all cooks off anyway.
Full-fat coconut milk — This is non-negotiable. Shake the can well before opening so the cream and liquid are combined. Light coconut milk won’t give you the right texture — the sauce will be too thin. If you want to make this easy dairy free caramel sauce with coconut milk and you want it to actually be thick and luscious, go full-fat, every time. I like So Delicious unsweetened coconut milk — consistent texture, no weird additives.
Vegan butter — Miyoko’s is my favorite for this because it has a richer flavor, but Earth Balance works great too. Stick (not tub) for best results.
Vanilla extract — Pure, not imitation. It makes a difference in something this simple.
Flaky sea salt — Optional, but honestly, why would you skip it? The salt rounds out the sweetness and adds complexity. Maldon is my go-to.
Instructions
-
Set up your workspace before you start. Have your coconut milk measured out and warmed slightly (microwave for 30 seconds — cold liquid hitting hot caramel causes violent bubbling and potential burning). Get your vegan butter and vanilla right next to the stove. Once the sugar starts cooking, you don’t have time to dig around for things.
-
Combine the sugar and water in a medium heavy-bottomed saucepan over medium heat. Stir gently just to combine, then stop stirring entirely. Do not stir again once the heat is on. Stirring causes crystallization — just swirl the pan gently if you need to redistribute the heat.
-
Cook over medium heat until the sugar dissolves and the mixture starts to bubble, about 3–4 minutes. At this point it’ll look like clear syrup. Keep going.
-
Watch for color. The syrup will start to turn golden around the edges first. Swirl the pan gently to even it out. You want to cook it until it reaches a deep amber — like a copper penny, or dark honey. This takes another 5–7 minutes. Don’t rush it. Pale caramel = bland caramel.
-
Remove the pan from heat and immediately pour in the warm coconut milk in a slow, steady stream. Stand back a little — it will bubble up aggressively. That’s exactly what’s supposed to happen. Whisk constantly as you pour.
-
Return the pan to low heat and whisk for another 1–2 minutes until smooth and any hardened bits have dissolved. If you see small clumps of sugar, just keep whisking on low heat — they’ll melt.
-
Pull the pan off heat again. Add the vegan butter and vanilla extract and stir until the butter is fully melted and incorporated. The sauce will look glossy and slightly thickened. If adding salt, stir it in now and taste.
-
Let it cool for 10 minutes before transferring to a jar. It will thicken considerably as it cools. If it gets too thick in the fridge, just warm it gently and it’ll pour right again.
Tips & Substitutions
Don’t walk away. Caramel goes from perfect to burnt in about 30 seconds. Stay right there at the stove, eyes on the pan.
For a thicker sauce: Let it reduce for an extra 2–3 minutes on low heat after adding the coconut milk. It’ll firm up even more once cooled.
No coconut milk? Full-fat oat milk or cashew cream can work in a pinch, but the texture won’t be quite as silky. Coconut milk is genuinely the best dairy-free option for this application — the fat content is what makes it work.
For a dairy free salted caramel sauce recipe: Go with ½ tsp of flaky salt stirred in at the end, then taste. You can always add more, but you can’t take it back.
Crystallization happened? If your caramel seizes up and goes grainy, don’t throw it out. Add 2 tablespoons of water, put it back on low heat, and stir gently — most of the time it’ll come back together. If it’s completely hardened, same trick.
Storage: Keeps in a sealed jar in the fridge for up to 2 weeks. Reheat in the microwave in 15-second intervals, stirring between each. Don’t overheat or it can separate.
Make it deeper: Try adding a pinch of espresso powder with the vanilla. It doesn’t taste like coffee — it just makes the caramel flavor more complex and a little less one-note. One of my favorite tricks.
This vegan caramel sauce also works beautifully as a drizzle over Gluten Free Banana Bread or spooned over a bowl of Gluten Free Apple Crisp. Both pairings are very much tested and approved.
Frequently Asked Questions
How do you make caramel without dairy? You swap the heavy cream for full-fat canned coconut milk and use vegan butter instead of regular butter. The fat content in coconut milk is high enough that it behaves very similarly to cream — you get the same richness and glossy texture without any dairy. The technique (wet caramel method, deep amber color) stays exactly the same.
What milk is best for dairy free caramel? Full-fat canned coconut milk is hands-down the best option. It has the fat content needed to emulsify with the hot caramel and create a thick, smooth sauce. Light coconut milk, almond milk, and oat milk are lower in fat and tend to produce a thinner, less stable sauce. If you can only find carton coconut milk, it’ll work in a pinch but expect a thinner result.
Why did my dairy free caramel turn grainy? Graininess almost always means the sugar crystallized. This can happen if you stir the sugar while it’s cooking (don’t stir — just swirl), if your pan wasn’t clean, or if there were sugar crystals on the side of the pan that fell back in. A pastry brush dipped in water can be used to brush down the sides of the pan while cooking to prevent this.
Can I make dairy free caramel sauce ahead of time? Absolutely — this is actually one of those sauces that benefits from a day in the fridge. Make it, let it cool completely, then store it in a sealed glass jar for up to 2 weeks. Reheat gently before serving. It thickens quite a bit when cold, so don’t be surprised — it’ll loosen right back up with a little warmth.
How do I know when the caramel is dark enough? Look for a deep amber color — think copper penny or dark honey, not pale gold. Smell is also a good indicator: you’ll notice a slightly toasty, nutty aroma. If it smells sharp or acrid and is going very dark brown, you’ve gone too far and it’s bitter. Pull it at that deep amber stage and you’ll be in great shape.
The Bottom Line
This dairy free caramel recipe is genuinely one of the most useful things you can have in your fridge. 🍯 It takes 20 minutes, one pan, and a handful of ingredients — and it tastes like the real thing, not like a compromise.
The two things that matter most: let the sugar get actually dark (deep amber, not pale), and use full-fat canned coconut milk, not the stuff in a carton. Nail those two things and you’re set.
Make a big batch, keep it in a jar in the fridge, and drizzle it on everything. You’ll find uses for it you never expected. And if someone asks what’s in it, feel free to enjoy their surprise when you tell them. 😄
Per serving
Nutrition facts, the honest kind
Calculated from the exact ingredients we tested with. Estimates — your numbers will vary slightly based on brand and portion size.
- Calculated per serving (8 servings total)
- Includes all components as written
- No specialty-ingredient guesswork
Nutrition Facts
8 servings per recipe
Calories 145 kcal
% Daily Value*
Total Fat 6g
Total Carbohydrate 24g
Dietary Fiber 0g
Protein 0g
* Percent Daily Values are based on a 2,000 calorie diet. Estimated values; your numbers may vary.
More from the kitchen
All recipes