 Side
Side 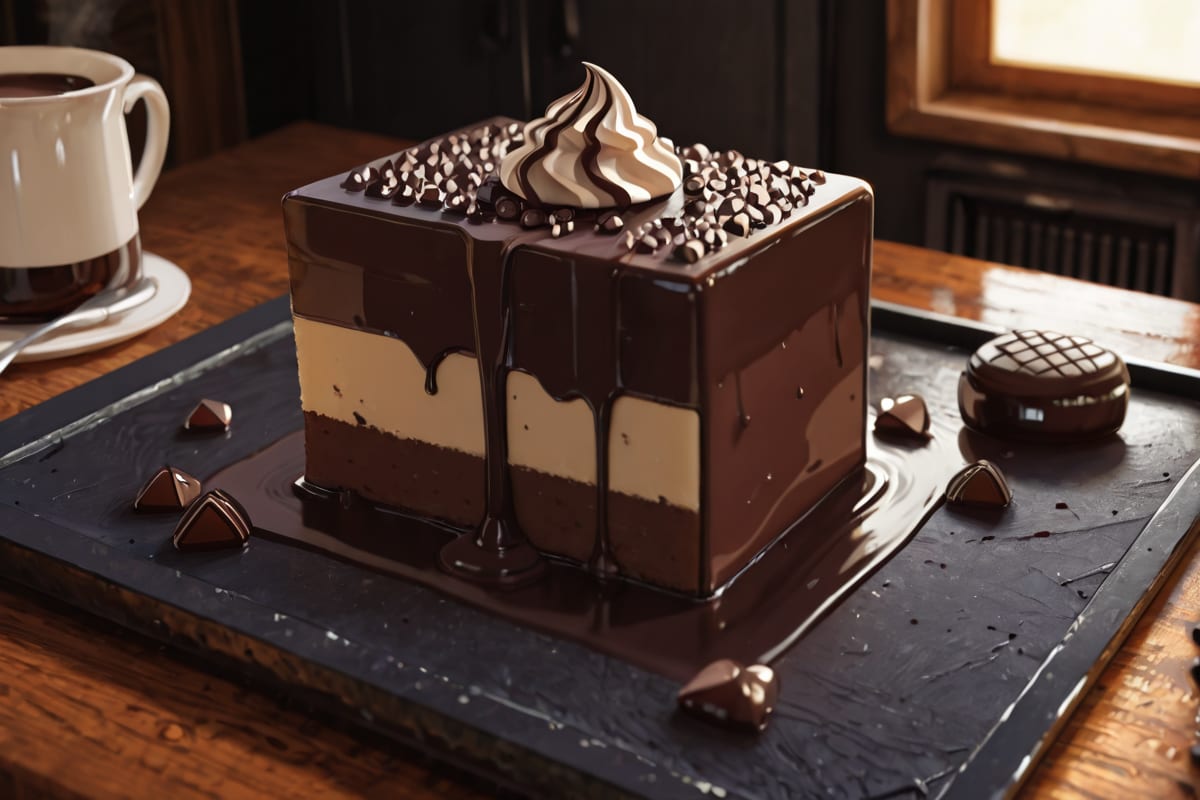
Gluten-Free · Dairy-Free · Dessert  By SavoryFolks May 27, 2026
4.9
By SavoryFolks May 27, 2026
4.9
Gluten Free Dairy Free Chocolate Mousse Cake — Fudgy, Airy, Totally Addictive
A rich gluten free dairy free chocolate mousse cake with a fudgy base and silky mousse layer. No one will miss the gluten or dairy. Seriously.
Hey folks,
So you want a chocolate mousse cake that’s gluten free AND dairy free but actually tastes like something worth celebrating — not a compromise. I’ve got you. This gluten free dairy free chocolate mousse cake has a dense, fudgy chocolate base, a cloud-soft dairy-free mousse layer, and a glossy ganache on top that makes it look way more professional than it actually is to pull off. The first time I made this, I brought it to a birthday party without announcing it was allergy-friendly. People went back for seconds. Then thirds. Nobody asked questions — they were too busy eating.
The mousse is the part that trips most people up, so let me be upfront: you have to refrigerate the coconut cream cans overnight. Skipping that step means you get soup instead of mousse, and I’ve learned that the hard way (truly a sad, soupy memory). Everything else is pretty forgiving. The cake base comes together in one bowl, the mousse whips up in about five minutes if your cans are properly chilled, and the ganache is just two ingredients. This is genuinely a weekend project you can feel good about. Let’s get into it.
Why It Works
The secret to making a great gf df chocolate cake recipe — one that isn’t dry or crumbly — is fat and acid working together. Here the applesauce and coconut milk provide moisture and a little natural sweetness, while the apple cider vinegar reacts with the baking soda to give you real lift. No eggs, no butter, no problem. Because the cocoa powder pulls double duty as both a flavoring agent and a structural element (cocoa absorbs liquid and adds body), you end up with a cake that slices cleanly even though it’s completely dairy free.
As for the mousse: cold coconut cream separates into a thick, whippable solid at the top of the can and watery liquid at the bottom. You scoop out just the solid part. According to Bob’s Red Mill’s guide to gluten-free baking, fat-to-moisture ratio is especially critical in GF baked goods because there’s no gluten network to hold things together — so every bit of fat you add is pulling weight.
Melted dairy-free dark chocolate gets folded into the whipped coconut cream while it’s still warm but not hot. That’s the technique detail that changes everything: too hot and it deflates the cream, too cold and the chocolate seizes into little chips. Somewhere in between — like, just barely warm — and you get this glossy, smooth, intensely chocolatey mousse that holds its shape beautifully once chilled. I spent two failed batches figuring out that “warm” range. Now you don’t have to.
Ingredients
For the cake base: Bob’s Red Mill Gluten Free 1-to-1 Baking Flour is what I use every single time. It already has xanthan gum in it, so you don’t need to add any. Use a high-quality Dutch-process or natural unsweetened cocoa — this is where most of the chocolate flavor lives, so don’t cheap out. Full-fat coconut milk (not the light kind) keeps the cake moist and dense. The applesauce replaces eggs and adds a subtle fruitiness you genuinely cannot detect once the chocolate is involved.
For the mousse: Two cans of full-fat coconut cream that have been in the fridge since last night. This is non-negotiable. I keep a couple cans in my fridge basically at all times now because when the craving hits, I want to be ready. Dairy-free dark chocolate chips — I reach for Enjoy Life semi-sweet because they melt smoothly and have great flavor. The powdered sugar is just to balance the bitterness slightly; you can cut it back if you like it really dark.
For the ganache: Same dairy-free chocolate chips plus a splash of coconut milk. That’s it. The ganache firms up beautifully in the fridge and gives you that shiny, dramatic finish that makes people think you spent way more time on this than you did.
Instructions
-
Prep your pans and oven. Preheat to 350°F. Grease a 9-inch round cake pan and line the bottom with parchment. If you want a layered situation, use two 8-inch pans — I’ll explain that option in Tips.
-
Whisk the dry ingredients. In a large bowl, combine the GF 1-to-1 flour, cocoa powder, baking soda, baking powder, salt, and sugar. Give it a good whisk to break up any cocoa clumps — those clumps will stay in the finished cake if you don’t break them up now. Ask me how I know.
-
Mix the wet ingredients separately. In a measuring cup or smaller bowl, stir together the applesauce, coconut milk, oil, vanilla, and apple cider vinegar. The vinegar will make it look slightly curdled. That’s totally normal and exactly what you want.
-
Combine wet and dry. Pour the wet into the dry and fold together until just combined. Don’t overmix — a few small lumps are fine. Overmixing a GF batter makes it gummy and dense. Pour into your prepared pan.
-
Bake. 35 minutes for a 9-inch pan, start checking at 30 minutes for 8-inch pans. A toothpick should come out with a couple of moist crumbs but no wet batter. My oven runs a little hot, so I pull it at 32–33 minutes. Know your oven.
-
Cool completely. This part matters more than you think. The cake needs to be at room temp — ideally fully cooled for an hour — before you add the mousse. If it’s even slightly warm, the mousse will melt on contact. Set it on a wire rack and walk away.
-
Make the mousse. Open your chilled coconut cream cans without shaking them. Scoop out the thick solid cream from the top into a large bowl — you should get about 1.5 cups total from two cans. Save the leftover liquid for smoothies. Melt the dairy-free chocolate chips in a heatproof bowl in 30-second microwave bursts, stirring between each, until smooth. Let the melted chocolate cool for 3–5 minutes — it should feel barely warm to the touch, not hot.
-
Whip the coconut cream. Using a hand mixer or stand mixer, beat the scooped coconut cream with powdered sugar, vanilla, and a pinch of salt until fluffy and smooth, about 2–3 minutes. Don’t overbeat — it can split if you go too long.
-
Fold in the chocolate. Pour the just-barely-warm melted chocolate into the whipped coconut cream. Fold gently with a spatula until fully combined and glossy. It’ll look a little streaky at first — keep folding, gently, and it’ll come together. Refrigerate the mousse for 15 minutes if it feels too loose to spread.
-
Layer the cake. Place your cooled cake on a serving plate or cake board. Spread the mousse generously over the top in a thick, even layer. Smooth with an offset spatula or the back of a spoon. Pop the whole thing in the fridge for at least 1 hour — 2 is better — before you add the ganache.
-
Make the ganache. Heat the coconut milk in a small saucepan over medium-low until it just starts to steam — not boiling, just steaming. Pour it over the chocolate chips in a heatproof bowl and let it sit for 2 minutes, then stir until completely smooth and glossy. Let it cool for 5 minutes.
-
Finish the cake. Pour the ganache slowly over the center of the chilled mousse-topped cake and let it spread naturally toward the edges. Tilt the plate slightly if you want drips down the side — that’s the move that makes it look legit. Dust with cocoa powder and a pinch of flaky salt. Refrigerate for another 30 minutes before slicing.
Tips & Substitutions
The two-layer version. For an easy gf df chocolate mousse layer cake, split the batter between two 8-inch pans, bake for 28–30 minutes, and double the mousse recipe. Stack them with mousse in the middle and on top, then pour the ganache over everything. It’s extra impressive and honestly not much more work. Just give yourself an extra hour for chilling between layers.
For an even richer result. If you want a truly rich gluten free dairy free chocolate mousse cake — like, really next-level — add 2 tablespoons of espresso powder to the cake base dry ingredients. You won’t taste coffee. You’ll just taste more chocolate. It’s the trick professional bakers use and I refuse to stop talking about it.
Flour options. I’m a Bob’s Red Mill 1-to-1 person through and through, but King Arthur Gluten Free Measure for Measure Flour works just as well here. If you want to try a nut-based version, you can swap in 1.5 cups of almond flour — but you’ll need to add 1 extra tablespoon of cocoa and expect a slightly denser, fudgier texture. Not bad, just different.
No coconut flavor. If you’re not a coconut person — and some people genuinely aren’t — refined coconut milk and refined coconut cream have virtually zero coconut taste. The unrefined versions have a more noticeable tropical flavor. In this allergy friendly chocolate cake, it’s honestly very subtle either way because the chocolate is so dominant, but refined gives you a totally neutral base.
Make it ahead. This cake actually gets better overnight. The mousse firms up, the flavors meld, and the cake base gets even fudgier as it sits. You can make the full assembled cake (minus the ganache) up to 2 days ahead and refrigerate it, then add the ganache and cocoa dusting the day you serve it.
No Enjoy Life chips? Any dairy-free dark chocolate chips work here. Just check the label — some “dark chocolate” chips still contain milk solids. Look for brands that say “dairy free” explicitly on the packaging.
Frequently Asked Questions
How do you make chocolate mousse cake without gluten or dairy? You replace the gluten with a GF flour blend (one with xanthan gum already in it), use full-fat coconut cream as your mousse base, and swap dairy chocolate for dairy-free dark chocolate chips. The method is identical to a traditional mousse cake — the ingredients just need to come from the right sources. Chilling the coconut cream overnight is the step most people miss and it’s the one that makes or breaks the mousse.
What chocolate should you use for a gf df mousse cake? Look for dairy-free dark chocolate chips or baking bars — I use Enjoy Life semi-sweet most often because they melt smoothly and have good flavor. Check the label even on dark chocolate, since some brands still include milk. You want something with at least 60% cacao for the best mousse flavor. Chips work great here; no need to buy fancy baking bars.
Can you make this cake ahead of time? Yes — and honestly you should. The assembled cake (base + mousse) can be refrigerated up to 2 days before serving. Add the ganache on the day you plan to serve it. The mousse actually sets up better and the flavors deepen after a night in the fridge.
How do you store leftover chocolate mousse cake? Keep it covered in the fridge. The mousse and ganache both need to stay cold. It’ll keep well for up to 4 days. Let individual slices sit at room temp for about 10 minutes before eating — cold mousse straight from the fridge is a bit stiff and you lose some of the creaminess.
Can you freeze this cake? You can freeze the cake base on its own, well-wrapped, for up to a month. The assembled mousse cake doesn’t freeze as well — the mousse texture gets a little grainy after thawing. My recommendation is to freeze the base and make the mousse fresh when you’re ready to serve. It takes maybe 20 minutes and the result is dramatically better.
The Bottom Line
This gluten free dairy free chocolate mousse cake is genuinely one of the best things I make. 🍫 The layered textures — dense fudgy base, airy mousse, glossy ganache — hit every note you want from a celebratory chocolate dessert. It takes a little planning (those coconut cream cans need to be cold!), but nothing about it is actually hard. Once you’ve got the timing down, it becomes the recipe you bring to every birthday, every holiday, every occasion where you need to impress people without saying a word about what’s in it.
If you’re into this kind of rich, crowd-pleasing GF dessert, check out our Gluten Free Dairy Free Chocolate Lava Cakes for a weeknight version with serious drama — or our Gluten Free Almond Flour Brownies if you want something you can make in 40 minutes without thinking too hard about it.
Make it. Refrigerate it. Watch people lose their minds over it.
Per serving
Nutrition facts, the honest kind
Calculated from the exact ingredients we tested with. Estimates — your numbers will vary slightly based on brand and portion size.
- Calculated per serving (10 servings total)
- Includes all components as written
- No specialty-ingredient guesswork
Nutrition Facts
10 servings per recipe
Calories 410 kcal
% Daily Value*
Total Fat 26g
Total Carbohydrate 44g
Dietary Fiber 4g
Protein 5g
* Percent Daily Values are based on a 2,000 calorie diet. Estimated values; your numbers may vary.
More from the kitchen
All recipes