 Breakfast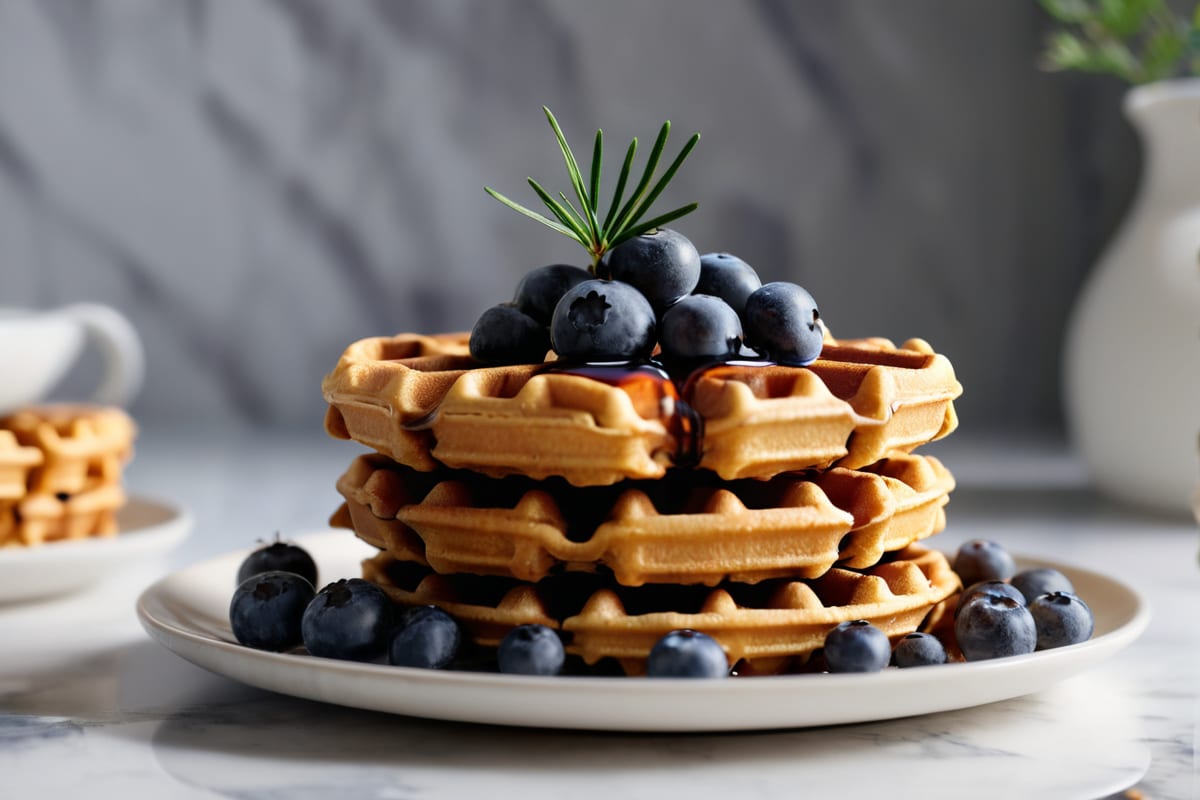
Gluten-Free · Dairy-Free · Breakfast  By SavoryFolks May 18, 2026
4.9
By SavoryFolks May 18, 2026
4.9
Gluten Free Dairy Free Waffles — Crispy Outside, Fluffy Inside
These gluten free dairy free waffles come out crispy on the outside and fluffy in the middle every single time. Ready in 35 minutes.
Hey folks,
Can we talk about the waffle struggle? Because I spent way too long making gluten free dairy free waffles that came out either pale and floppy, or so dense they could double as a doorstop. The problem isn’t that GF DF waffles are hard — it’s that most recipes skip the two or three small things that actually make the difference between a sad, steaming pile and something genuinely crispy and golden that you’d be proud to put on the table.
This recipe finally nailed it for me. The combination of GF all-purpose flour and certified GF oat flour gives you structure without gumminess. The coconut oil keeps things light and helps the exterior get that crunch you’re looking for. And the apple cider vinegar? Yeah, it sounds weird, but it reacts with the baking soda and gives the whole batter a little lift. I’ve made this on lazy Sunday mornings, for my picky nephew, and even batch-cooked them for weekday meal prep. They freeze perfectly, which is honestly half the reason I keep coming back to this recipe.
These dairy free gluten free waffles are the real deal. Let me show you exactly how I make them.
Why It Works
The secret to these gluten free dairy free waffles isn’t one single trick — it’s three things working together.
First, the flour blend. Using just one gluten-free flour almost never works the way you want. A single-flour batter tends to go either gluey or crumbly. Mixing a GF 1-to-1 flour with certified GF oat flour gives you two different starch and protein structures working in tandem. The 1-to-1 flour handles most of the lifting (it usually has xanthan gum already in it, which is your glue here), and the oat flour adds a subtle earthiness and helps with that soft interior. According to Bob’s Red Mill’s guide to gluten-free baking, hydration and binder ratios are the two most important variables in GF baking — and this recipe is calibrated for both.
Second, the fat. Coconut oil over any other oil, for two reasons. It has a higher smoke point than vegetable oil, which means it handles the high heat of a waffle iron without burning. And it goes solid at room temp, which means the cooked waffle holds its shape and crunch as it cools instead of getting soft and limp. This is specifically why these gf df crispy waffles stay crispy even when you stack them — at least for a few minutes.
Third, the acid. Apple cider vinegar + baking soda = a real reaction. You’ll actually see it bubble a little when the batter comes together. That tiny amount of CO2 production is what keeps the interior light instead of dense. Don’t skip it, don’t reduce it.
Ingredients
Here’s the full rundown and what each ingredient is doing:
Gluten-free 1-to-1 baking flour — This is your base. I use Bob’s Red Mill Gluten Free 1-to-1 Baking Flour because it already has xanthan gum built in, so the batter holds together without any extra gums. King Arthur Measure for Measure works great too.
Certified GF oat flour — Makes the waffles tender without adding weight. Make sure yours says “certified gluten-free” on the bag — regular oat flour can have cross-contact issues.
Baking powder + baking soda — Both. The baking powder gives slow rise, the baking soda reacts with the vinegar for immediate lift. You want both.
Unsweetened almond milk — Light enough not to weigh down the batter. Oat milk works too, but almond milk keeps things a little crispier at the edges since it’s less starchy. For crispy gluten free dairy free waffles with almond milk, this is the move — just go with unsweetened so you control the sweetness yourself.
Coconut oil — Melted and slightly cooled before you add it. If it’s too hot, it’ll scramble your eggs. Been there.
Apple cider vinegar — Just one teaspoon. This is the thing everyone asks about, and yes it matters. No, you can’t taste it.
Eggs — Two large. They bind the batter and add structure. If you need egg-free, see the Tips section.
Vanilla + sugar — Both optional if you’re going savory, but honestly this is a breakfast waffle and it should taste like one.
Instructions
-
Preheat your waffle iron. Turn it on and let it come to full temperature before you add any batter. A cold iron = stuck, pale waffles. I always let mine heat for at least 5 minutes.
-
Whisk the dry ingredients. In a large mixing bowl, combine the GF 1-to-1 flour, oat flour, baking powder, baking soda, sugar, and salt. Give it a good whisk so everything is evenly distributed — lumpy dry mixes lead to uneven batter.
-
Mix the wet ingredients. In a separate medium bowl, whisk together the eggs, almond milk, melted coconut oil, vanilla, and apple cider vinegar. The mixture might look a little separated — that’s fine.
-
Combine wet and dry. Pour the wet into the dry and stir until just combined. A few lumps are totally fine. Don’t overmix — I mean it. Overmixed GF batter gets gluey and the waffles come out dense. Stir until you don’t see dry flour, then stop.
-
Rest the batter for 3–4 minutes. Just let it sit on the counter. This gives the flours time to hydrate and the leavening to activate. You’ll see it puff up slightly. My waffle iron finishes preheating in this time anyway, so it works out perfectly.
-
Grease the iron. Even if yours is non-stick, give it a light spray of cooking spray or a quick brush of coconut oil right before the first waffle. GF batters stick more than regular batters, and the first waffle is always the test waffle anyway.
-
Pour and cook. Use about ¾ cup batter per waffle (adjust based on your iron size — mine takes about that). Close the lid and don’t open it early. I wait until the steam coming out the sides slows down noticeably, usually 4–5 minutes depending on the iron. Then I open and check. If it looks golden and pulls away from the grid cleanly, it’s done.
-
Keep warm in the oven. Set your oven to 200°F and place cooked waffles directly on the rack (not stacked on a plate — that traps steam and makes them soggy). They’ll hold for up to 20 minutes this way.
-
Repeat with remaining batter. Re-grease the iron lightly between each waffle if you notice sticking.
Tips & Substitutions
Don’t open the waffle iron too soon. This is the mistake I see most often. If you lift the lid before the waffle is set, you’ll tear it in half. Wait for the steam to slow, then check. If there’s resistance when you try to open it — close it again and wait another minute.
Egg-free version: Replace the 2 eggs with 2 flax eggs (2 tbsp ground flax + 6 tbsp water, rested 5 minutes). The waffles will be slightly less crispy on the outside but still totally solid. If you search for gf df waffles oat flour coconut oil and you want them vegan too, this is your path. The rest of the recipe stays exactly the same.
Milk swaps: Almond milk is my go-to, but oat milk (certified GF), coconut milk (the carton kind, not the can), and cashew milk all work. Canned coconut milk makes the waffles a bit richer and slightly denser — not bad, just different.
Extra crispy tip: Add one extra tablespoon of coconut oil to the batter. It makes a noticeable difference on the crust. My oven runs hot, so I sometimes also leave the waffles in the iron an extra 30 seconds past when I think they’re done — that last little push gives you the deepest golden color.
Make-ahead and freezing: These freeze beautifully. Let them cool completely on a wire rack, then freeze in a single layer on a baking sheet for 1 hour. Once frozen, stack them in a zip bag. Reheat in a toaster or toaster oven at 375°F for 3–4 minutes — they come back almost perfectly crispy. Microwave reheating works but they’ll be softer.
Savory variation: Skip the sugar and vanilla, add ¼ tsp garlic powder and 2 tbsp nutritional yeast to the dry mix. They make an unbelievably good base for eggs and avocado.
What if the batter is too thick? Add almond milk a tablespoon at a time until it pours like a thick pancake batter. Different GF flour blends absorb liquid differently, so this is totally normal.
Frequently Asked Questions
How to make waffles without gluten or dairy? The key is swapping GF flour for wheat flour and using a plant-based milk like almond or oat milk instead of dairy milk, plus coconut oil or vegan butter instead of regular butter. A blend of GF 1-to-1 flour and certified GF oat flour works best for structure and texture. Apple cider vinegar and baking soda together help replace some of the lift that gluten normally provides.
What milk is best for GF DF waffles? Unsweetened almond milk is my first pick — it’s thin enough not to weigh the batter down, which helps the waffles get crispy at the edges. Oat milk (certified GF) comes in a close second and gives a slightly richer flavor. Avoid full-fat canned coconut milk in the batter — it makes things too dense, though the carton-style coconut milk is fine.
Why are my gluten free waffles coming out soggy? Three common culprits: the waffle iron wasn’t hot enough before you added batter, you opened the iron too early, or you stacked the waffles on a plate while they were hot (the steam re-absorbs into the waffle). Let the iron fully preheat, don’t rush the cook time, and rest finished waffles on an oven rack at 200°F instead of stacking them.
Can I make gluten free dairy free waffles ahead of time? Yes, and they’re actually great for meal prep. Cook a full batch, let them cool completely on a wire rack, then freeze in a single layer before bagging them up. Reheat in a toaster or toaster oven — not the microwave if you care about crispiness — and they come back really close to fresh.
Can I use almond flour instead of GF all-purpose flour for these waffles? You can partially, but I wouldn’t go more than ½ cup almond flour as a substitute for part of the oat flour. Full almond flour waffles tend to fall apart because almond flour lacks the starch and structure that a GF 1-to-1 blend provides. For a gluten free dairy free waffles almond flour version that actually holds together, use almond flour alongside the GF blend, not as a full replacement.
The Bottom Line
These gluten free dairy free waffles genuinely surprised me the first time I got them right. 🧇 They’re the kind of breakfast that doesn’t feel like a compromise — crispy edges, soft middle, and they hold up to toppings without getting floppy.
The short version of what makes them work: two-flour blend, coconut oil, don’t skip the vinegar, and for the love of everything don’t open the waffle iron early.
If you’re making these for the first time, trust the rest time after you mix the batter. Those 3–4 minutes matter. And grease the iron every single time — even the “non-stick” ones.
If you want more easy GF DF breakfast options, try our Gluten Free Dairy Free Pancakes next — same kind of vibe, same pantry ingredients, just a different format. Or if you’re in a baked goods mood, our Gluten Free Dairy Free Banana Bread is always a crowd-pleaser.
Make them once and you’ll have them on rotation all month. Promise.
Per serving
Nutrition facts, the honest kind
Calculated from the exact ingredients we tested with. Estimates — your numbers will vary slightly based on brand and portion size.
- Calculated per serving (4 servings total)
- Includes all components as written
- No specialty-ingredient guesswork
Nutrition Facts
4 servings per recipe
Calories 310 kcal
% Daily Value*
Total Fat 13g
Total Carbohydrate 42g
Dietary Fiber 3g
Protein 7g
* Percent Daily Values are based on a 2,000 calorie diet. Estimated values; your numbers may vary.
More from the kitchen
All recipes