 Dinner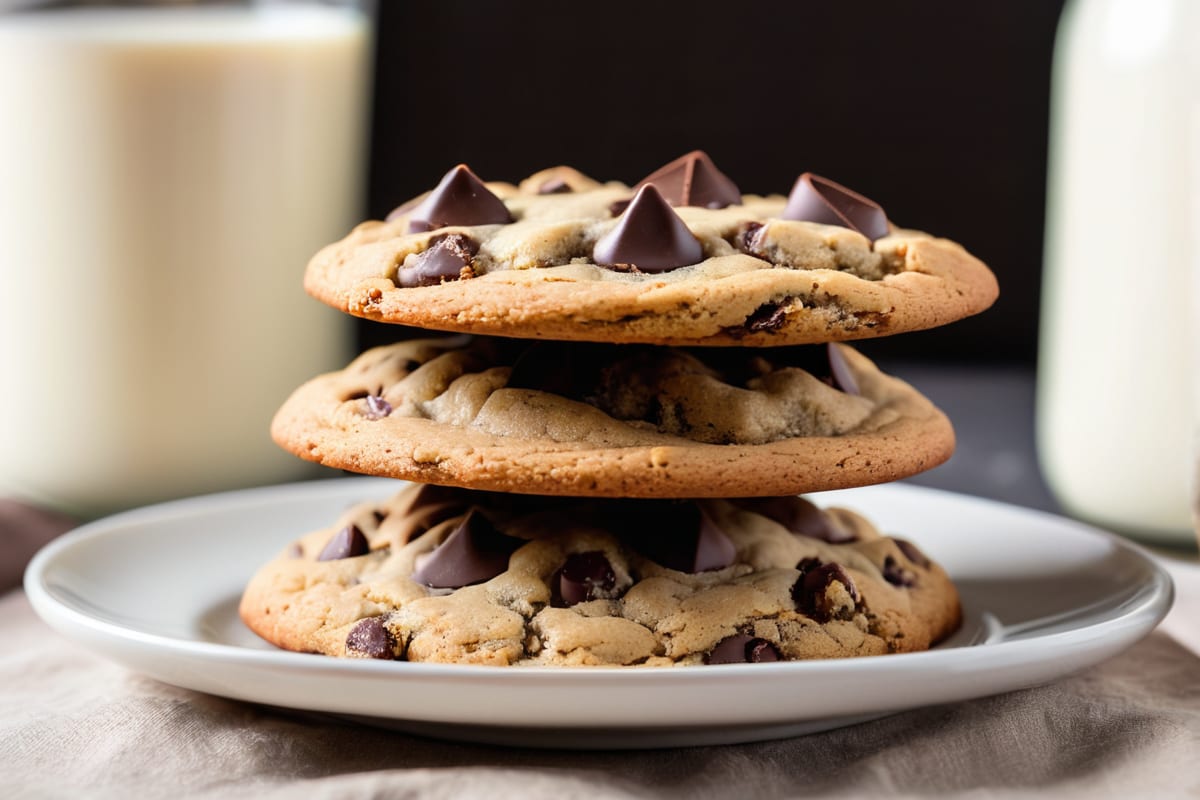
Gluten-Free · Dairy-Free · Dessert  By SavoryFolks May 18, 2026
4.9
By SavoryFolks May 18, 2026
4.9
Dairy Free Cookies — Crispy Edges, Chewy Centers, No Butter Needed
These dairy free cookies deliver crispy edges and chewy centers using coconut oil. Better than the real thing, and ready in under 30 minutes.
Hey folks,
So here’s the thing — I spent a genuinely embarrassing amount of time trying to crack dairy free cookies that don’t taste like a sad compromise. You know the ones. Weirdly cakey, slightly greasy, and somehow both underbaked and dry at the same time. Yeah. I’ve been there. I made a version once with just swapped-in vegan butter and ended up with cookies that spread into one giant flat puddle across my baking sheet. Not great.
These dairy free cookie recipes I’ve tried over the years taught me one thing: the fat matters more than almost anything else. Swap it wrong and you’re fighting an uphill battle. Swap it right — meaning refined coconut oil at exactly the right consistency — and you get cookies with crispy, slightly caramelized edges and centers that stay genuinely chewy for days. Not chewy-on-day-one-then-rock-hard-by-day-two. Actually chewy.
The other trick is the brown-to-white sugar ratio. More brown sugar than white. That’s it. That single change is responsible for more chew than anything else in this recipe, and most cookie recipes don’t lean into it hard enough. These do. And the result is honestly the best dairy free cookies that taste amazing — as in, guests who have zero dietary restrictions will demolish these without asking questions.
Ready? Let’s do this.
Why It Works
The magic here comes down to understanding what butter actually does in a cookie — and then replacing that function, not just the ingredient.
Butter does two things: it adds fat for richness and it contains water (about 15–18%), which creates steam and helps the cookie spread and puff slightly. When you swap in coconut oil, you’re getting a fat that’s almost 100% fat — no water content at all. That’s why cookies made with melted coconut oil turn greasy and flat. The fat ratio is all wrong.
The fix is using coconut oil that’s solid but still soft — think the texture of softened butter, around 65–70°F. You cream it with the sugars exactly like you would butter. That mechanical process traps air, which helps with lift. And because refined coconut oil has almost no coconut flavor (don’t use unrefined here if you don’t want your cookies tasting like a piña colada), it’s genuinely neutral. According to USDA FoodData Central, coconut oil provides about 121 calories per tablespoon with a fat composition similar to butterfat in its saturated content, which is exactly why it behaves so well in baking.
The brown sugar ratio matters too. Brown sugar is hygroscopic — it pulls moisture from the air and holds it — which is what keeps these cookies chewy well past day one. A higher ratio of brown to white sugar directly impacts texture in a way that no amount of extra flour can fix.
One more thing: room temperature eggs. I know, I know — everyone says this and it sounds fussy. But cold eggs hitting solid coconut oil will seize the fat up and make the dough look broken and lumpy. It’ll bake out okay, but the texture suffers. Just set your eggs out 20 minutes before you start. Not a big ask.
Ingredients
Here’s what you need for about 24 cookies. I’ll flag the parts where the brand actually matters:
Refined coconut oil — This is the one ingredient where I’ll insist on a specific type. Refined, not unrefined. Solid, not melted. If your kitchen is warm and your coconut oil has melted to liquid, stick it in the fridge for 15–20 minutes until it firms back up. Do not skip this.
Dairy-free chocolate chips — I use Enjoy Life semi-sweet chocolate chips in basically every dairy free chocolate chip cookies recipe I make. They’re genuinely good chocolate — not waxy, not overly sweet — and they melt beautifully in the oven. No dairy, no soy, no nuts. One bag = one batch with a little left over for snacking.
Brown sugar + granulated sugar — Stick with the 3:1 brown-to-white ratio I’ve listed. Changing this will change your texture. I’ve tested it both ways. The version with equal sugars is fine but noticeably cakier.
All-purpose flour — This recipe uses regular all-purpose flour. If you need it gluten-free too, check out our gluten free dairy free chocolate chip cookies — that one’s built from the ground up for both swaps.
Vanilla extract — Two teaspoons feels like a lot. It’s not. Cookies need more vanilla than you think, especially when you’re working without the rich background flavor that dairy butter provides.
Fine sea salt — Don’t skip it. Salt in cookies isn’t about making them salty — it’s about making the chocolate taste more like chocolate. A full teaspoon is right.
Instructions
-
Preheat and prep your pans. Set your oven to 375°F. Line two baking sheets with parchment paper — not silicone mats for this recipe, because parchment gives you better bottom browning. If you only have one baking sheet, no problem, just bake in two batches.
-
Check your coconut oil. It needs to be solid and soft, like softened butter. If it’s liquid, refrigerate for 15 minutes. If it’s rock-hard, let it sit at room temperature for 10 minutes. You want it to leave an indent when you press it but not squish through your fingers.
-
Cream the coconut oil and sugars. In a large bowl, beat the solid coconut oil with both sugars using a hand mixer or stand mixer on medium-high for a full 2 minutes. It should look fluffy and slightly lighter in color. This step is building the structure — don’t rush it.
-
Add the eggs and vanilla. Beat in the eggs one at a time, then add the vanilla. Mix until fully combined, about 30 seconds per egg. The mixture should look smooth and cohesive. If it looks a little curdled, keep mixing — it’ll come together.
-
Add the dry ingredients. Add the flour, baking soda, and salt. Mix on low until just combined — meaning you can barely see the last streaks of flour disappearing. This is where overmixing will make your cookies tough. Stop early.
-
Fold in the chocolate chips. Use a spatula and fold them in by hand. This takes maybe 10 strokes. Don’t use the mixer — it’ll break the chips.
-
Scoop the dough. Use a 1.5-tablespoon cookie scoop or a heaping tablespoon. Place them about 2 inches apart on your prepared baking sheets. If you want thicker cookies, refrigerate the scooped dough for 30 minutes before baking — totally optional but makes a noticeable difference in how much they spread.
-
Bake. 375°F for 10–12 minutes. You want the edges to look set and lightly golden, but the centers should still look slightly underdone — like they’re not quite there. They will continue cooking on the hot pan after you pull them out. I pull mine at exactly 11 minutes because my oven runs a little hot. Check yours at 10.
-
Cool on the pan. Leave them on the baking sheet for 5 minutes before transferring to a wire rack. This is mandatory — they’re structurally fragile right out of the oven and will fall apart if you move them too soon.
Tips & Substitutions
Coconut oil substitutes: If coconut oil isn’t your thing, vegan butter (Earth Balance or Miyoko’s) works well in this recipe as a 1:1 swap. Just use it at room temperature. I’d avoid olive oil — it works in some no butter cookies recipes but the flavor is too assertive here.
For easy dairy free chocolate chip cookies with coconut oil, temperature is everything. I said it in the instructions but I’ll say it again here because it’s the one step people skip: if the oil is liquid, your cookies will spread too thin. Refrigerate the dough for 20–30 minutes if your kitchen is warm (above 72°F).
Egg-free option: Replace both eggs with 2 flax eggs (2 tablespoons ground flaxseed + 6 tablespoons water, rested for 5 minutes). The cookies will be denser and slightly chewier — honestly still really good, just a little more substantial.
Making dairy free sugar cookies: This dough isn’t ideal for cut-out shapes because it spreads. If you want dairy free sugar cookies, use vegan butter instead of coconut oil, reduce the brown sugar to ½ cup, and increase the flour by 2 tablespoons. Chill the dough for at least an hour before rolling. It’ll hold its shape.
Adding mix-ins: Chopped walnuts, pecans, dried cranberries, or a sprinkle of flaky salt on top before baking all work great. I’m partial to the flaky salt — it turns a good cookie into a great one.
Storage: Keep them in an airtight container at room temperature for up to 5 days. Or freeze the scooped raw dough on a baking sheet, then transfer to a zip bag — you can bake straight from frozen, just add 2–3 minutes to the bake time. Honestly, I always keep a bag of frozen cookie dough in my freezer. Best decision I’ve made.
Want to explore more no butter cookies recipes? Check out our dairy free snickerdoodles — same technique, completely different vibe.
Frequently Asked Questions
How to make cookies without butter or dairy? The most reliable swap is refined coconut oil or vegan butter — both work as 1:1 replacements for dairy butter by weight. The key is making sure whichever fat you use is at the right temperature: soft and solid, not melted. For dairy free cookie recipes, also check all other ingredients for hidden dairy (some chocolate chips, some sprinkles, and some vanilla extracts can contain trace dairy).
What butter substitute works best for dairy free cookies? Refined coconut oil gives you the crispiest edges and most neutral flavor. Vegan butter (specifically Miyoko’s or Earth Balance) is a closer functional substitute and is better if you want the cookie to taste as close as possible to a traditional butter cookie. Avoid margarine with hydrogenated oils — the texture ends up waxy.
Can I use olive oil or vegetable oil instead? You can, but I’d only recommend it as a last resort. These liquid oils will make your cookies spread very flat and can turn greasy. If you go this route, reduce the oil by about 2 tablespoons and chill the dough for at least an hour before baking. Coconut oil or vegan butter genuinely give you better results.
Why are my dairy free cookies spreading too much? Almost always comes down to warm fat. If the coconut oil or vegan butter is even slightly melted when you start creaming, you’ve lost the structural integrity the solid fat provides. Refrigerate your dough for 20–30 minutes before scooping, and make sure your baking sheets are fully cooled between batches.
Can I make these dairy free cookies ahead of time? Yes — and honestly this is how I prefer doing it. Scoop the dough onto a parchment-lined baking sheet, freeze until solid (about an hour), then transfer to a freezer bag. Bake directly from frozen at 375°F for 13–14 minutes. The cookies might even be slightly better than freshly made dough because the cold fat spreads more slowly, which gives you a thicker, chewier result.
The Bottom Line
These are genuinely the best dairy free cookies that taste amazing — not “good for dairy-free,” just good. 🍪
The coconut oil trick took me a few failed batches to figure out, but once you get the temperature right, this recipe is honestly pretty foolproof. Crispy edges, chewy centers, pools of melted chocolate. Nobody at your table is going to ask what’s different about them.
Make the dough, bake a batch, freeze the rest. You’ll thank yourself at 9pm on a Tuesday.
If you’re building out your dairy-free dessert rotation, we’ve got more where this came from — try our dairy free brownies next. Same approachable vibe, deeply chocolatey, and ready in about the same amount of time.
Per serving
Nutrition facts, the honest kind
Calculated from the exact ingredients we tested with. Estimates — your numbers will vary slightly based on brand and portion size.
- Calculated per serving (24 servings total)
- Includes all components as written
- No specialty-ingredient guesswork
Nutrition Facts
24 servings per recipe
Calories 168 kcal
% Daily Value*
Total Fat 8g
Total Carbohydrate 22g
Dietary Fiber 1g
Protein 2g
* Percent Daily Values are based on a 2,000 calorie diet. Estimated values; your numbers may vary.
More from the kitchen
All recipes